


Are you ready for a little DIY adventure? I’ve had this itch for a project that I just couldn’t shake, and this time, it was all about my kitchen appliances. So, if you’re itching to make your kitchen dreams come true without breaking the bank, grab a cup of coffee, kick back, and join me on this journey. Your kitchen is about to get a serious upgrade, my friend!
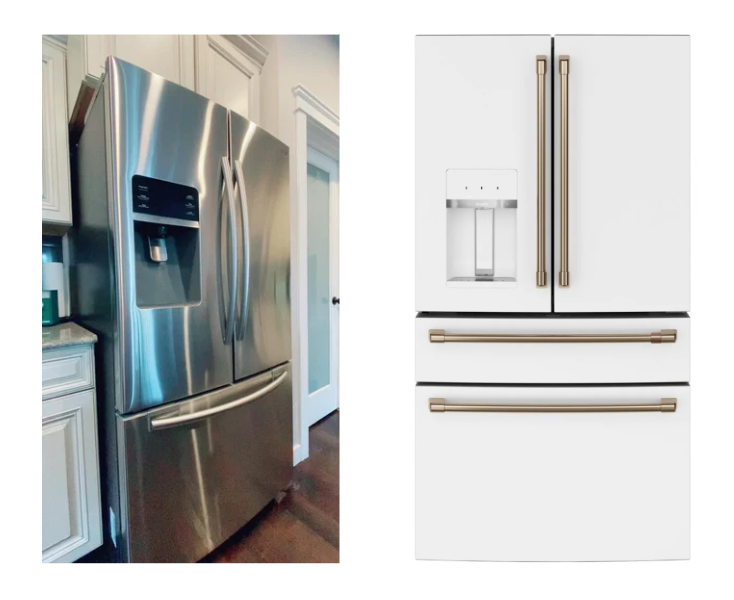
Let’s talk reality here – our appliances have seen better days. After a solid decade of service, they’re showing their age. Now, I have been eyeing those gorgeous Café brand appliances in white and gold, but let’s be real – they come with a hefty price tag. Plus, I wasn’t entirely sure if the white and gold combo would vibe with my kitchen. So just for reference, The pic on the left was my Fridge before….and the one on the right is the Cafe Brand fridge (with a price tag of $7300+) which is the look I was about to recreate.
So, one fateful morning at 3 am, inspiration struck (which happens often by the way) . Why not recreate the look myself? Down the rabbit hole, I went. I’m sure I’m not the first person to think of this, but the excitement was real. I couldn’t wait for Home Depot to open in the morning – I had to go now!
Bright and early, I was at the store, and lo and behold, Rust-Oleum had just what I needed – Epoxy Appliance Paint in white. So, when I discovered Rust-Oleum Epoxy Appliance Paint, I knew I had struck gold. Imagine turning your everyday appliances into chic, café-inspired pieces without the hefty price tag. Game changer, right?
Perfect match. I grabbed a can in the White Gloss, a couple of rollers, painter’s tape, and some sandpaper. But wait, what about gold for the handles? Ah, yes, I remembered using Antique Gold Rub n Buff on some of the most beautiful pieces of furniture that I have transformed in the past. So, naturally off to the local art store I went and found just what I was looking for.
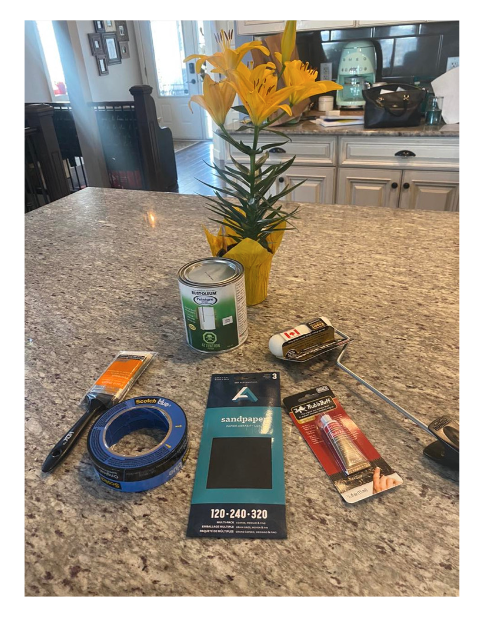
After gathering my supplies, I called up my husband and casually mentioned that I was going to paint the stove. Bless him, he’s used to my projects by now. All he said was, “Okay, babe, just make sure you put down a drop cloth.” (Below is a pic of my supplies)
Here’s what I used: (All the products I used and other suggestions can be found by clicking the link on my Amazon Store here: Canada, Us and UK or You can probably find at your local hardware store if not available on Amazon)
- Rust-Oleum Appliance Epoxy in White Gloss
- Small Roller
- Painters Tape
- Fine grit sandpaper
- Rub N Buff in Antique Gold (use a clear coat over) or any type of gold paint for metal surfaces.
- Paint brush if you need for edges
And so, the project began.
I started with the Stove, With the thought process being if I messed it up bad, it would be the cheapest appliance to replace right away.
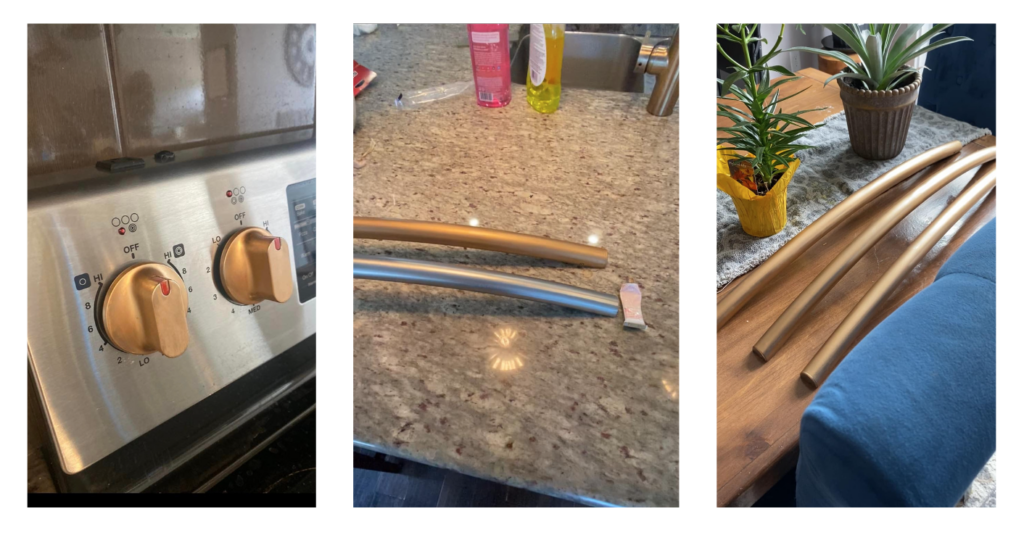
So, first things first, cleaning the appliances was a must. I removed the handles to make painting easier and taped off the sections I didn’t want to cover. Then, a gentle sanding to give the surfaces some extra grip for the epoxy to adhere to. I won’t lie – my heart was racing at this point. There was no turning back now.
With roller in hand, I dipped into the epoxy paint and got to work. The first coat went on like a dream, albeit looking a bit like primer. But trust me, it gets better with each coat. I ended up applying 3-4 coats, letting each one dry thoroughly in between. Don’t paint any surfaces that get hot or the inside of your stove!!!
While the paint dried, I tackled the knobs and appliance handles with the rub n buff in Antique Gold. I used a foam brush and it glided on perfectly. Quick tip – if you use this stuff, make sure to add a clear coat to protect it. Otherwise, you’ll find yourself constantly touching up those handles. Of course, you could opt for gold paint instead – I am just sharing what I used.
Of course, no makeover would be complete without a little patience. Drying and curing are key, my friends, so be sure to give your freshly painted appliances the time they need to set and shine especially between coats. Trust me, it’ll be worth the wait when you see the final result.
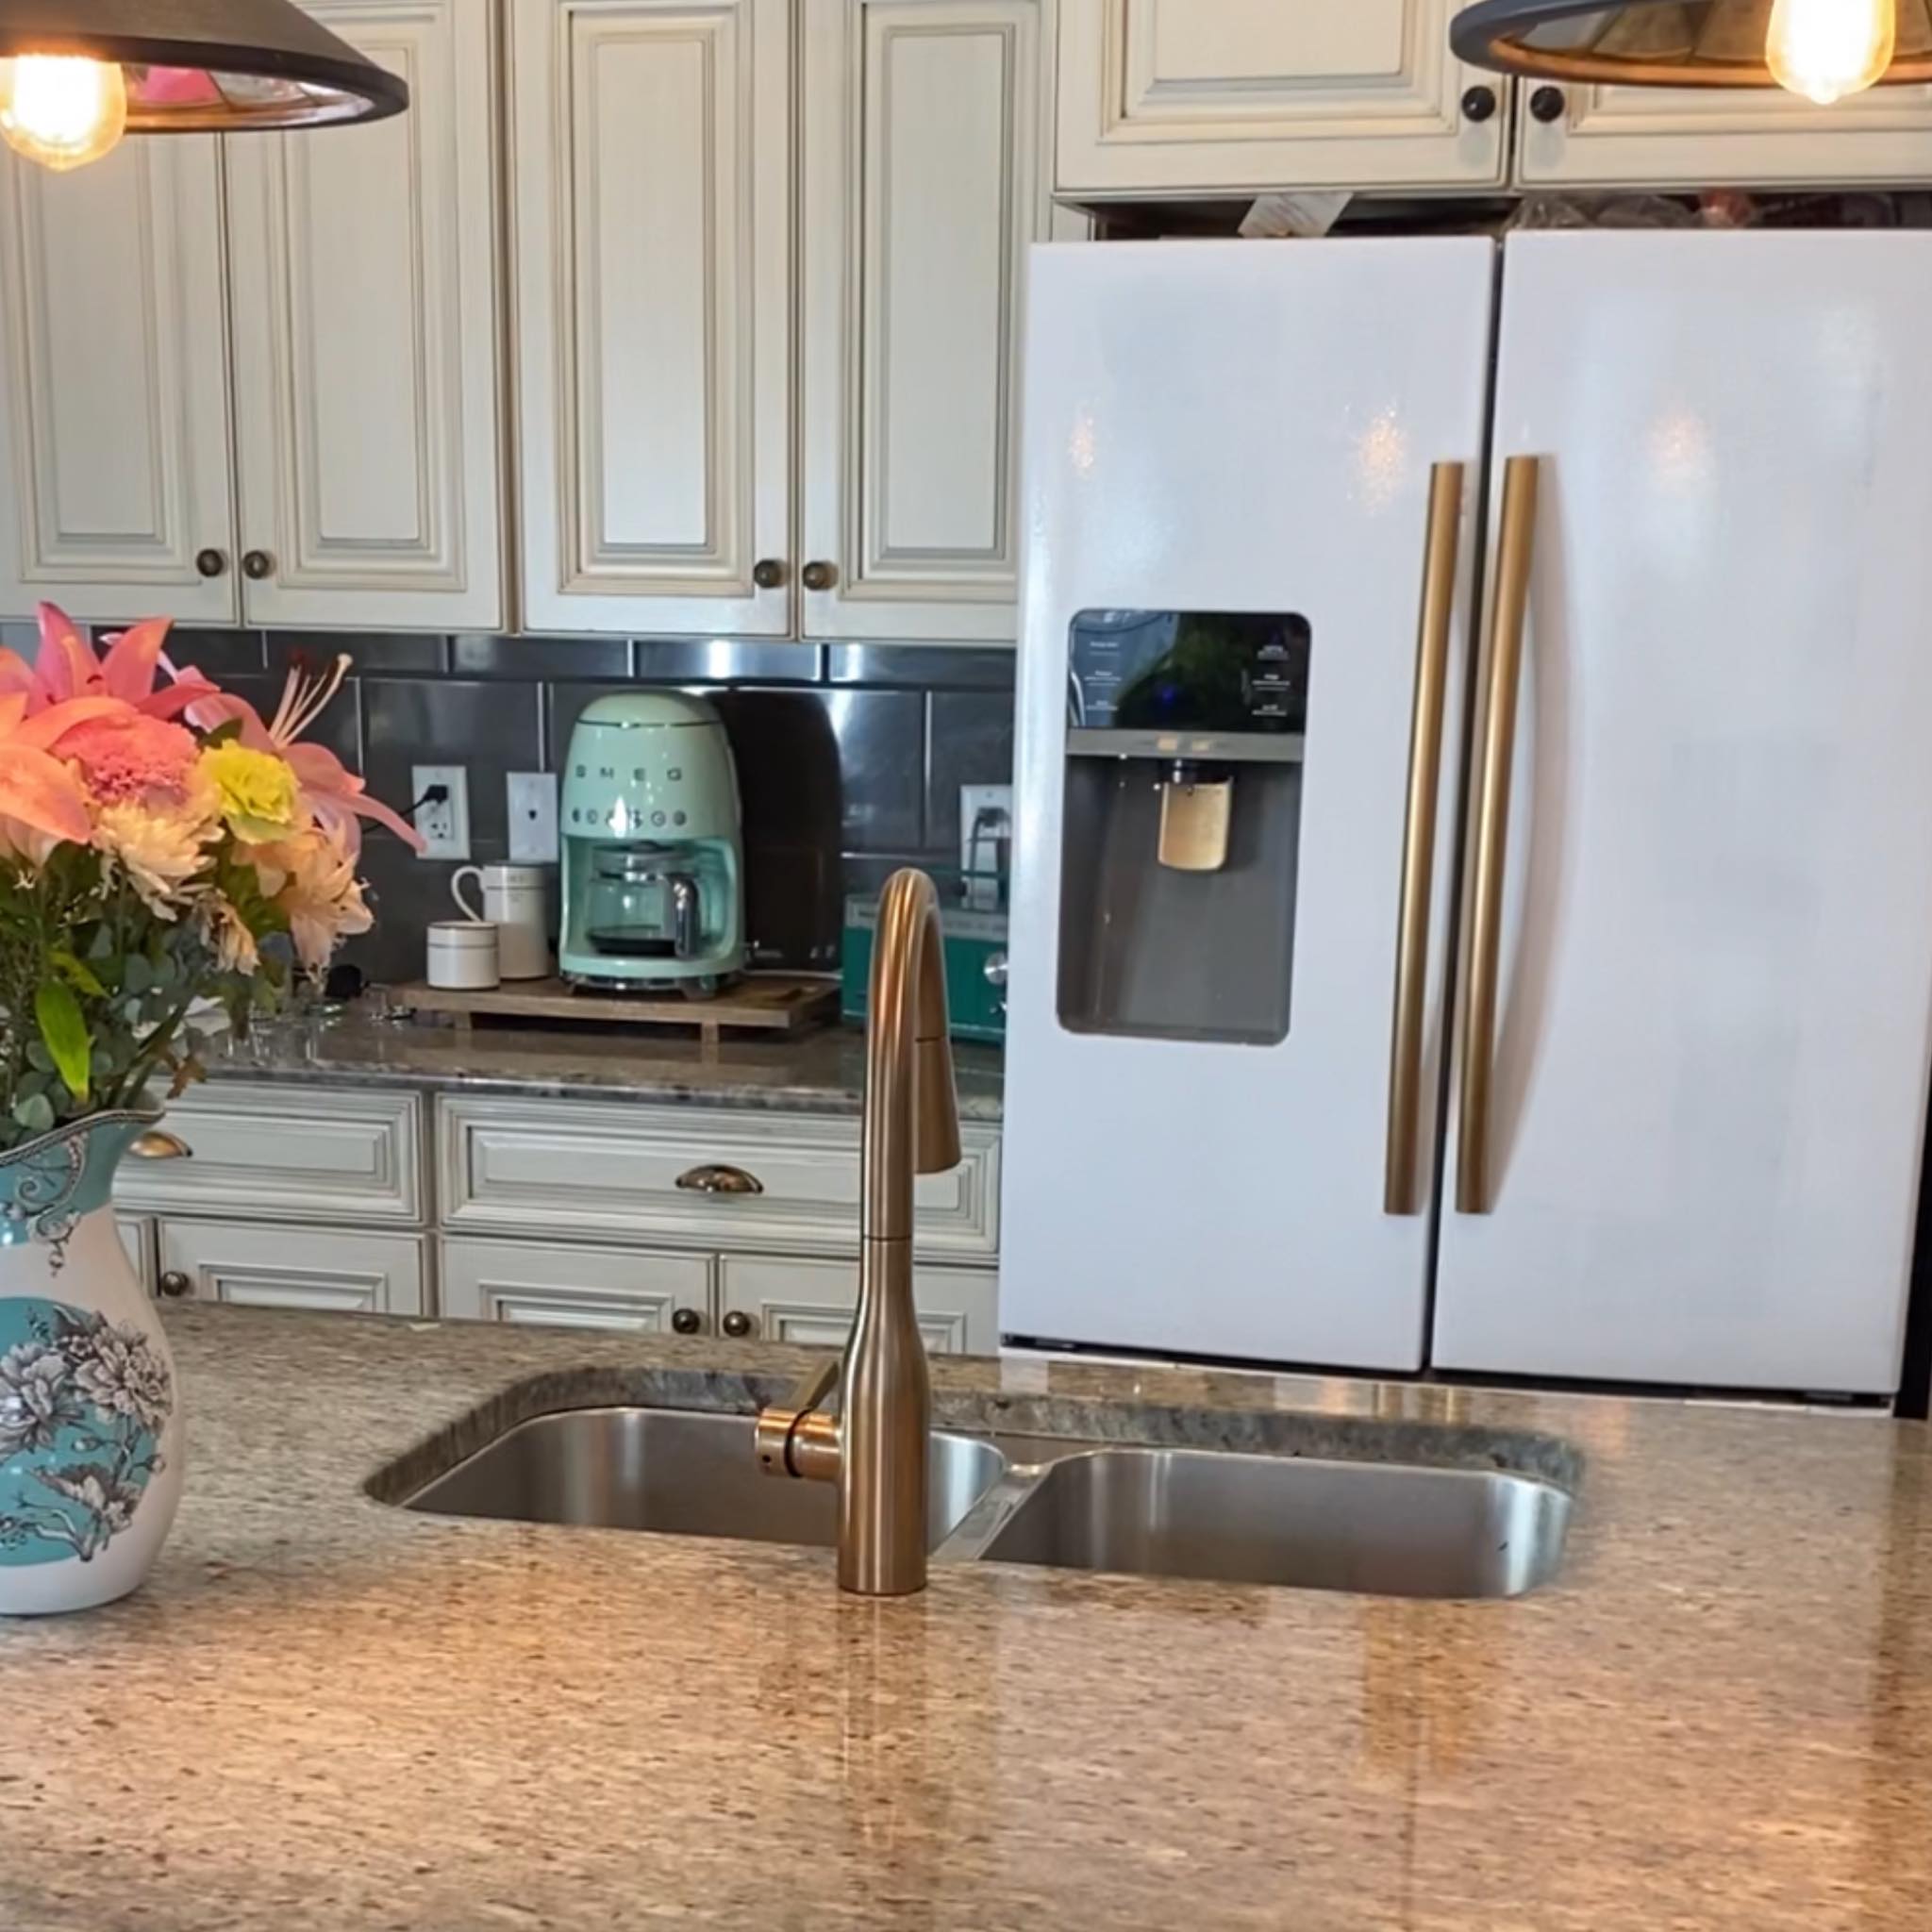
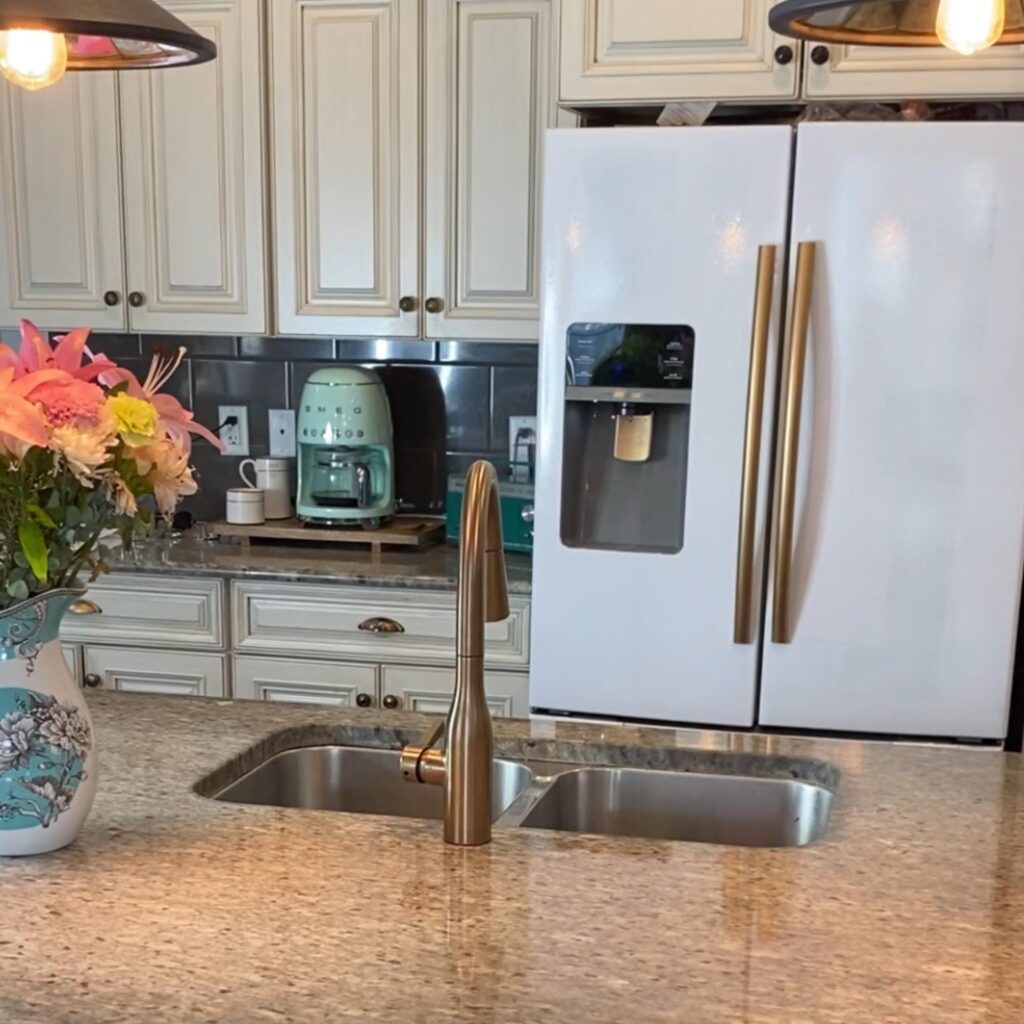
And now, the moment you’ve all been waiting for – the big reveal! Get ready to gasp in awe as I unveil my café brand inspired kitchen appliances.
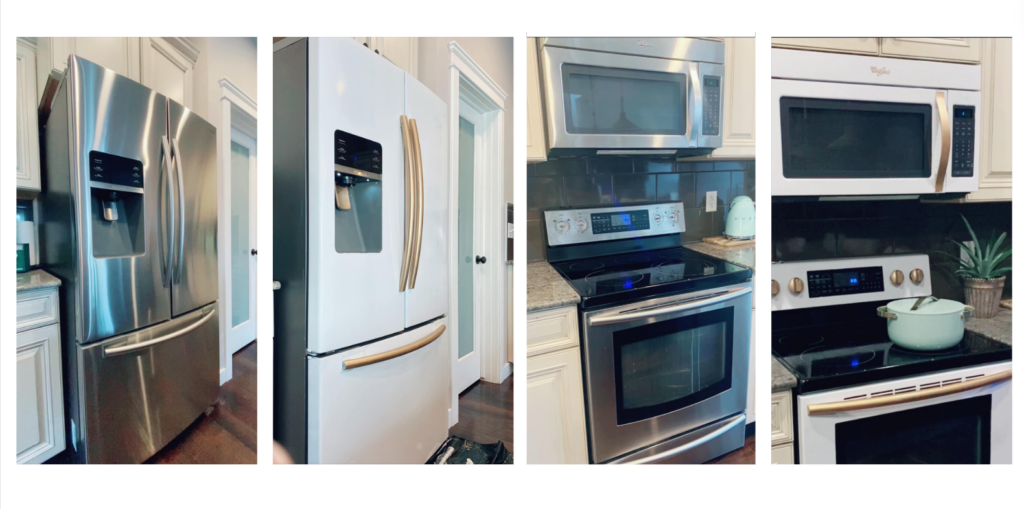
I am VERY happy with the results, and even happier with the money I saved . It has been almost a year, and I can tell you this Epoxy Did not chip or scratch and cleans like a dream. Bye Bye Fingerprints. I sure don’t miss those:)
So, if you’re ready to take your kitchen from drab to fab without breaking the bank, Rust-Oleum Epoxy Appliance Paint might just be your new best friend.
You can also watch the videos I shared below , showing the process and follow me on TikTok @kristasmusthaves
Embarking on this DIY journey with Rust-Oleum Epoxy Appliance Paint has been a game-changer for my kitchen’s aesthetic. I hope this blog post inspires you to take the plunge and revitalize your own kitchen space. Stay tuned for more DIY adventures and home improvement tips on my blog! This is just the first of many to come:)
Always in your corner, Krista with a “K”
P.s We were also featured in Livingetc magazine and GoodHousekeeping. Check out the articles here: https://www.livingetc.com/advice/can-you-paint-your-appliances
https://www.goodhousekeeping.com/home/renovation/a60669870/painting-appliances


+ show Comments
- Hide Comments
add a comment